Make your own ultra light micro connectors!
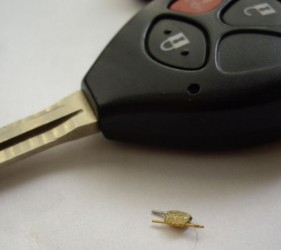
You can make your own ultra light polarized micro connectors at home!
Polarized means the have a male and a female set in one connector, thus preventing from mixing up the polarity.
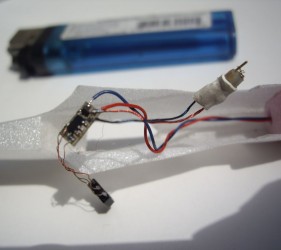
The end result is an ultra light 2 pin connector that you can use for various purposes in your micro electronics/hobby projects.
I use these connectors to connect batteries to the receivers on my RC micro airplanes. Example airplane see here: https://maxoffsky.com/tech-blog/rc-micro-spitfire-airplane-build-log/
Tools needed to make the micro connectors:
+ Gorilla Glue (http://www.amazon.com/gp/product/B0001GAYRC/ref=as_li_ss_tl?ie=UTF8&camp=1789&creative=390957&creativeASIN=B0001GAYRC&linkCode=as2&tag=maxoffsky-20)
+ Helping hands electronics clamp or similar (http://www.amazon.com/gp/product/B000RB38X8/ref=as_li_ss_tl?ie=UTF8&camp=1789&creative=390957&creativeASIN=B000RB38X8&linkCode=as2&tag=maxoffsky-20)
+ pin headers and pin sockets (MOUSER.com part numbers 575-500101 – header , 575-501101 – socket).
+ 0.9 mm drill bit (1mm might work) or some hot wire approx 0.8 mm diameter
The process of making your own connectors involves two distinct steps, first making a template for your connectors and second making the templates themselves.
Here is the process to make a template for your own polarized micro connectors:
1) cut one pair of pins from the header
2) pull one of the pins out of that pair (Use small pliers or push on the pin with something, they’re not hard to come out )
3) drill a bigger hole in the place of that pin that came out, this hole will be used for one of the socket pins. (I believe you have to use 0.9mm or 1mm drill bit for it, start with 0.9mm), if you don’t have a drill bit that small, try heating up a wire of smaller diameter and sticking it into the hole, the goal is to have enough room for the socket pin.
4) get one of the socket pins from the sockets with the pliers or by pushing on one side.
5) Put the socket pin in the hole you drilled.
6) Done.
Now, onto mass producing your own connectors :
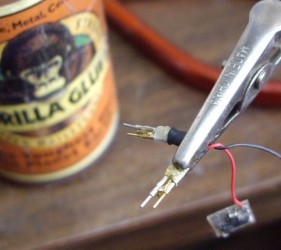
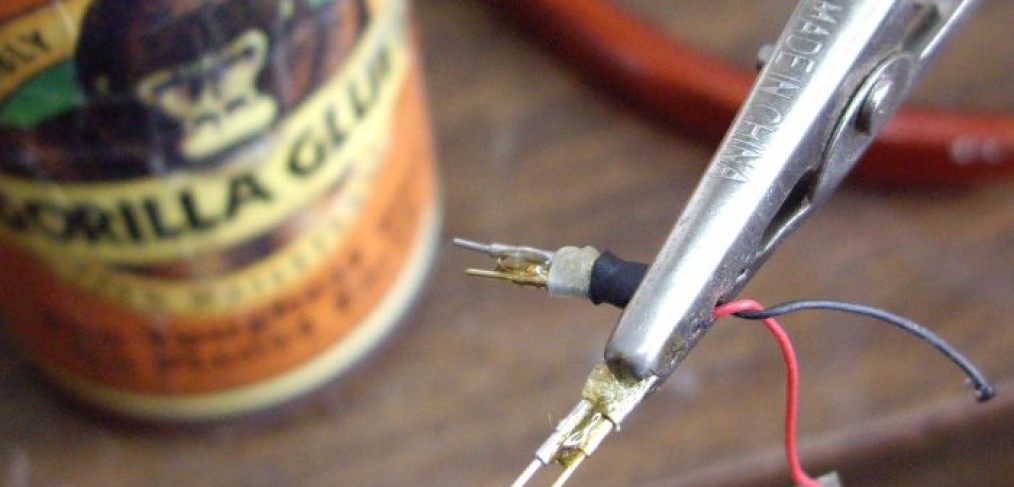
When you made one of the sets of polarized connectors with the method above, stick one pin in the socket and a socket on the pin (imagine it is a completed set connector). Then put a little drop of gorilla glue between them (you can use a neddle or a toothpick to have the drop of the glue on the end of it), make sure you put the drop not to close to the template connector, otherwise it will glue everything together including the template connector. Also make sure you keep this setup horizontally like in the picture. The glue expands and after 4 hours you should have a polarized connector in a drop of glue.
You can put a little bit of heatshrink tubing over it and heat it up so it won’t fall apart if too much force applied.
With this method you can make lots of connectors for a fraction of the cost on RC hobby webshops. And you get to have your own micro production line! (hint – make money!)
Enjoy!

