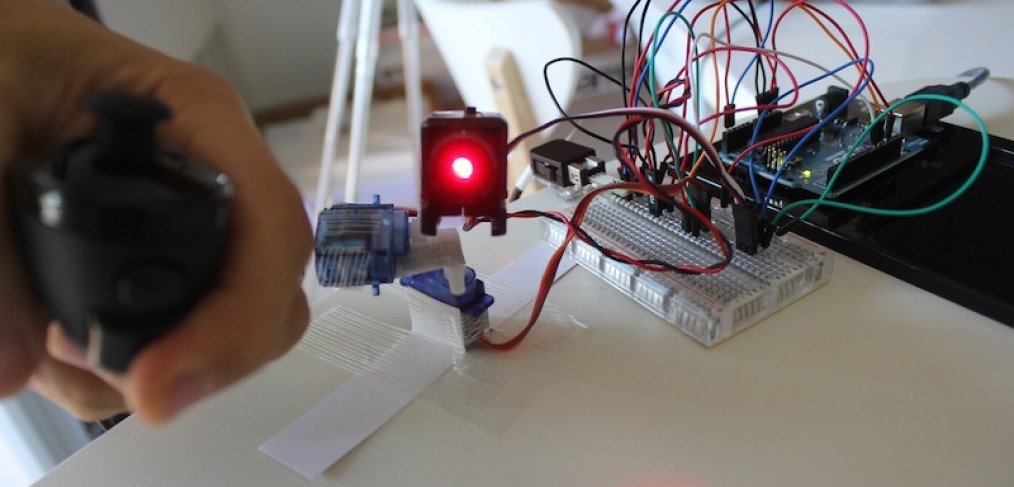
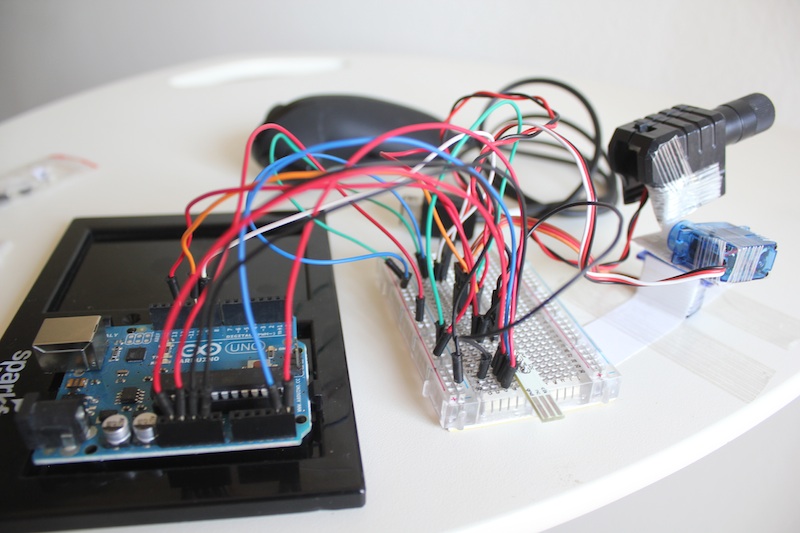
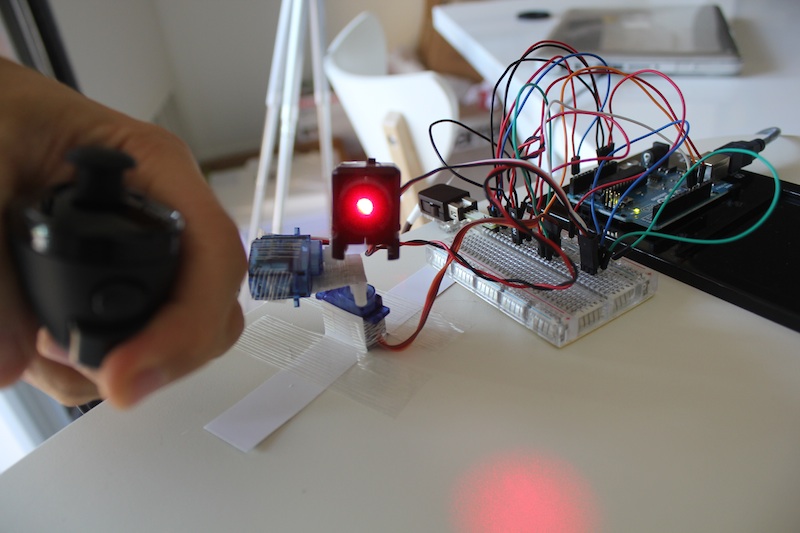
Arduino + WiiChuck steered laser pointer
Here’s something I made for fun a couple months ago and I need to make it again soon so I’m posting schematics and Source code for anyone to download and make their own fun toy with Arduino.
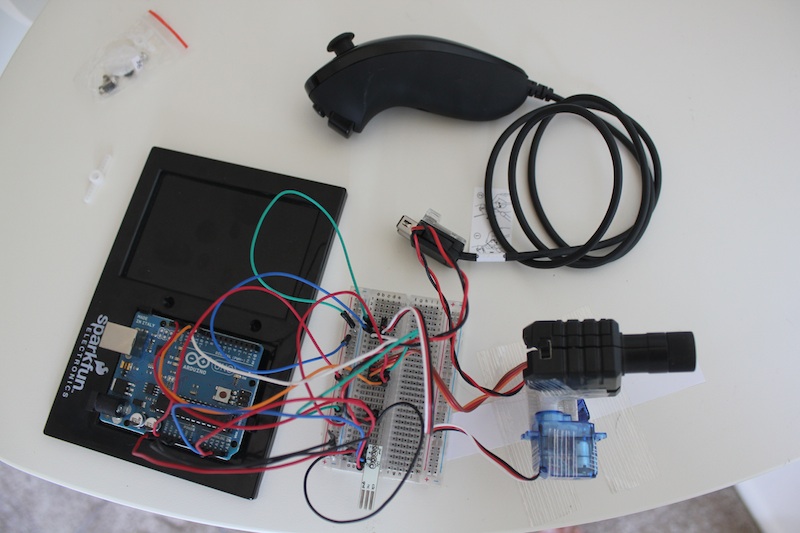
Parts list:
- Arduino Uno
- Original Wii Nunchuck
- Nunchuk to Arduino adapter (link below)
- Laser pointer
- 2 mini Servos
You can buy an adapter here :
http://todbot.com/blog/2008/02/18/wiichuck-wii-nunchuck-adapter-available/
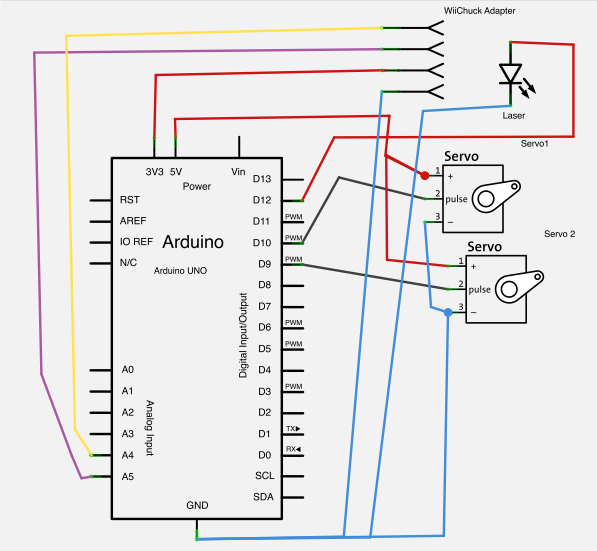
We are using the Wire library for I2C communication with the Nunchuk. See this reference where the I2C pins are on your Arduino: http://www.arduino.cc/en/Reference/Wire. On Arduino Uno the I2C pins are A4 and A5.
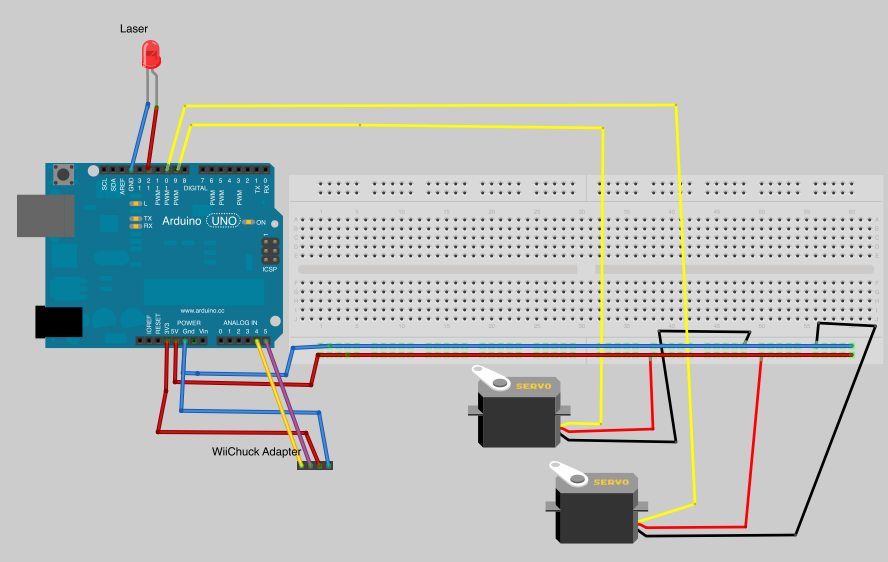
See schematics for more details on how to connect the components.

[code lang=”arduino”]
#include <Wire.h>
#include <string.h>
#include <stdio.h>
uint8_t outbuf[6];
int cnt = 0;
int ledPin = 13;
int laserPin = 12;
int servoPin = 9;
int servoPin2 = 10;
int pulseWidth = 0;
int pulseWidth2 = 0;
long lastPulse = 0;
long lastPulse2 = 0;
int z_button = 0;
int c_button = 0;
int refreshTime = 20;
int minPulse = 1000;
int minPulse2 = 500;
int dtime=10;
#define pwbuffsize 10
long pwbuff[pwbuffsize];
long pwbuffpos = 0;
long pwbuff2[pwbuffsize];
long pwbuffpos2 = 0;
void setup()
{
Serial.begin (9600);
Wire.begin ();
nunchuck_init ();
pinMode(servoPin, OUTPUT);
pinMode(servoPin2, OUTPUT);
pinMode(laserPin, OUTPUT);
pulseWidth = minPulse;
pulseWidth2 = minPulse2;
Serial.print ("Finished setupn");
}
void nunchuck_init()
{
Wire.beginTransmission (0x52);
Wire.write (0x40);
Wire.write (0x00);
Wire.endTransmission ();
}
void send_zero()
{
Wire.beginTransmission (0x52);
Wire.write (0x00);
Wire.endTransmission ();
}
int t = 0;
void loop()
{
t++;
long last = millis();
if( t == 1) {
t = 0;
Wire.requestFrom (0x52, 6);
while (Wire.available ()) {
outbuf[cnt] = nunchuk_decode_byte (Wire.read ());
digitalWrite (ledPin, HIGH);
cnt++;
}
if (cnt >= 5) {
// printNunchuckData();
int z_button = 0;
int c_button = 0;
if ((outbuf[5] >> 0) & 1)
z_button = 1;
if ((outbuf[5] >> 1) & 1)
c_button = 1;
switch (c_button) {
case 1:
switch (z_button) {
case 0:
digitalWrite(laserPin, LOW);
muovi();
break;
case 1:
digitalWrite(laserPin, HIGH);
muovi();
break;
}
break;
case 0:
switch (z_button) {
case 0:
break;
case 1:
//delay(3000);
break;
}
break;
}
}
cnt = 0;
send_zero();
} // if(t==)
updateServo();
delay(dtime);
}
void updateServo() {
if (millis() – lastPulse >= refreshTime) {
digitalWrite(servoPin, HIGH);
delayMicroseconds(pulseWidth);
digitalWrite(servoPin, LOW);
digitalWrite(servoPin2, HIGH);
delayMicroseconds(pulseWidth2);
digitalWrite(servoPin2, LOW);
lastPulse = millis();
}
}
int i=0;
void printNunchuckData()
{
int joy_x_axis = outbuf[0];
int joy_y_axis = outbuf[1];
int accel_x_axis = outbuf[2]; // * 2 * 2;
int accel_y_axis = outbuf[3]; // * 2 * 2;
int accel_z_axis = outbuf[4]; // * 2 * 2;
int z_button = 0;
int c_button = 0;
if ((outbuf[5] >> 0) & 1)
z_button = 1;
if ((outbuf[5] >> 1) & 1)
c_button = 1;
if ((outbuf[5] >> 2) & 1)
accel_x_axis += 2;
if ((outbuf[5] >> 3) & 1)
accel_x_axis += 1;
if ((outbuf[5] >> 4) & 1)
accel_y_axis += 2;
if ((outbuf[5] >> 5) & 1)
accel_y_axis += 1;
if ((outbuf[5] >> 6) & 1)
accel_z_axis += 2;
if ((outbuf[5] >> 7) & 1)
accel_z_axis += 1;
Serial.print (i,DEC);
Serial.print ("t");
Serial.print ("X: ");
Serial.print (joy_x_axis, DEC);
Serial.print ("t");
Serial.print ("Y: ");
Serial.print (joy_y_axis, DEC);
Serial.print ("t");
Serial.print ("AccX: ");
Serial.print (accel_x_axis, DEC);
Serial.print ("t");
Serial.print ("AccY: ");
Serial.print (accel_y_axis, DEC);
Serial.print ("t");
Serial.print ("AccZ: ");
Serial.print (accel_z_axis, DEC);
Serial.print ("t");
Serial.print (z_button, DEC);
Serial.print (" ");
Serial.print (c_button, DEC);
Serial.print ("rn");
i++;
}
char nunchuk_decode_byte (char x)
{
x = (x ^ 0x17) + 0x17;
return x;
}
void muovi (){
float tilt = (700 – outbuf[3]*2*2);
float tilt2 = outbuf[2]*2*2;
tilt = (tilt);
pulseWidth = (tilt * 5) + minPulse;
tilt2 = (tilt2-288);
pulseWidth2 = (tilt2 * 5) + minPulse2;
pwbuff[pwbuffpos] = pulseWidth;
pwbuff2[pwbuffpos2] = pulseWidth2;
if( ++pwbuffpos == pwbuffsize ) pwbuffpos = 0;
if( ++pwbuffpos2 == pwbuffsize ) pwbuffpos2 = 0;
pulseWidth=0;
pulseWidth2=0;
for( int p=0; p<pwbuffsize; p++ ){
pulseWidth += pwbuff[p];
pulseWidth2 += pwbuff2[p];
}
pulseWidth /= pwbuffsize;
pulseWidth2 /= pwbuffsize;
}
[/code]
You can download all code here :
WiiChuck Source code and schematics
Or Get it on Github (improvements welcome!):


Hi,
I wanted to let you know your Arduino project has been added to a list of 20 Arduino projects of 2012 published on Nudatech’s blog ( http://www.nudatech.com/blog/20-arduino-projects-of-2012/ ).
Please let me know if there’s any mistake in the short note I wrote about it and if the link I chose for it is the right one.
Obviously sharing the list on social networks, blogs and forums is also appreciated 🙂
Regards
Thank you for adding my project! Yes I will share with followers on Twitter =)
Great list, by the way, I already looked at some other projects like the plotter – I am building a laser cutter with Arduino so this info came in handy.
Thanks for one of the best infos on net.
Hey,how to make it work without the nunchuk adapter.
Like on makeprojects http://makeprojects.com/Project/Wii+Nunchuk+Mouse/3197/1 ,can it be connected via wires instead of adapter,if yes,then what changes are to be made.
PS: I am a novice,please help regarding this project,
Yes surely it can be connected via wires but why would you want to cut the connector?
Trying to duplicate the experiment and the system is not having fluid movements. It is as if the arduino is not reading the nunchuk. The arduino program prints “Finished Setupn” but does not print anything after that or move around.
Appreciate your assistance in trying to debug it
would there be a way you can modify the code that instead of using the acce use the joy stick. but keep all the other functions. im working on a project for a friend with MD an he cant move his had to use the acce. so if u could we would greatly appreciate it. an love the project by the way
would there be a way you can modify the code to use the joystick instead of the acce. but i want to keep all the other functions. i tried to myself but could not get it. im working on a project for a disabled friend who cant move his hand fare enough to use the acce. so if you could help we would greatly appreciate it. an love the project by the way
Hello, I, having some problems with the code. I connected everything properly and uploaded the code but it’s doing nothing at all. There is no interactivity with the nunchuck.